

Have you ever wondered if there was a more comfortable and real way to play your favorite GameBoy Color games? The original GameBoy Color is not an excellent example of handheld ergonomics, but its predecessor, the GameBoy Pocket is revered as the best ergonomic form amongst all of the GameBoy consoles.
The only problem, is that the GameBoy Pocket only functions with original DMG Cartridges, and uses a two-tone screen, which means it cannot play in color, which then means it can't play GBC games.
There has been a group of GameBoy modders who have tried (and mostly succeeded) in stuffing the GameBoy Color technology into a Pocket shell, but not until recently did someone venture as far as to design an entirely new PCB.
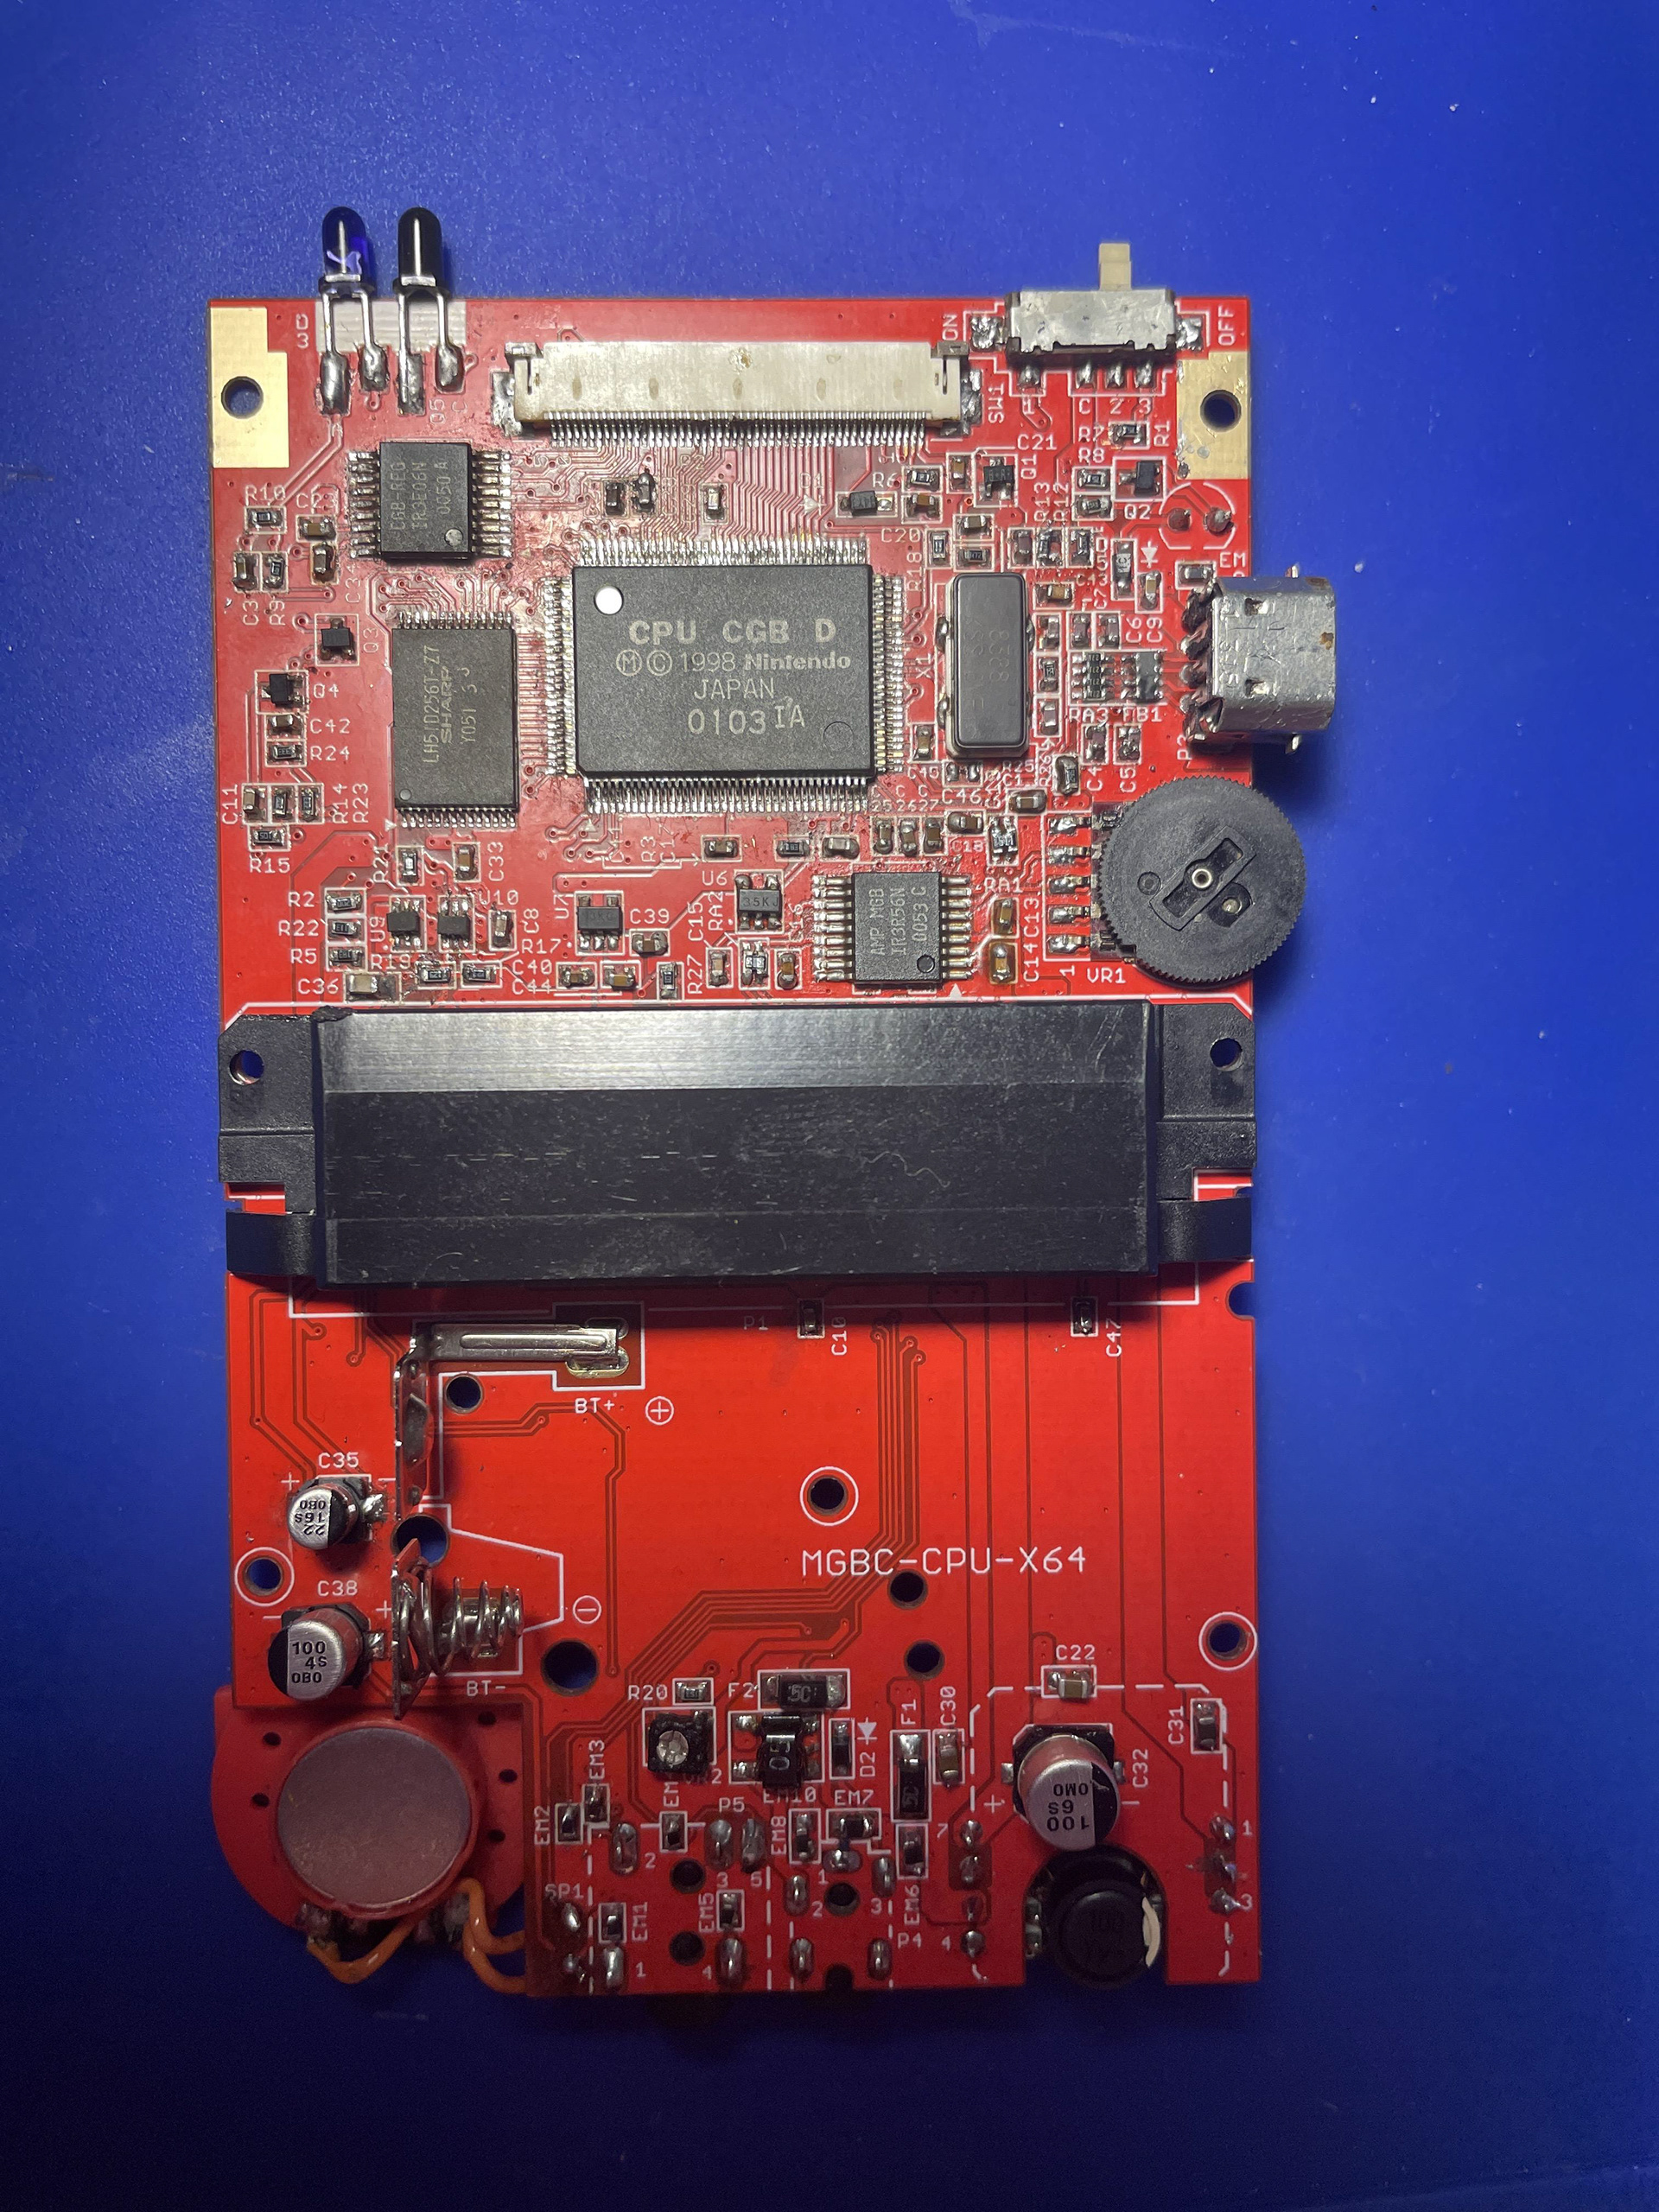
PICTURE 1
A modder by the name of Lukas (AKA N64Freak) posted about how they made a custom PCB in the shape of a GameBoy Pocket, but has the technical layout of a GameBoy Color. I spoke to Lukas and got some of these custom boards, and had them silkscreened in red to match my GameBoy theme, which is Clear/Red.
I started by pulling the components from a donor GBC that couldn't be sourced brand new (CPU, CGB-REG, AMP MGB, Crystal Oscillator, and the Cartridge Slot). The rest of the components I sourced brand new from Mouser Electronics.
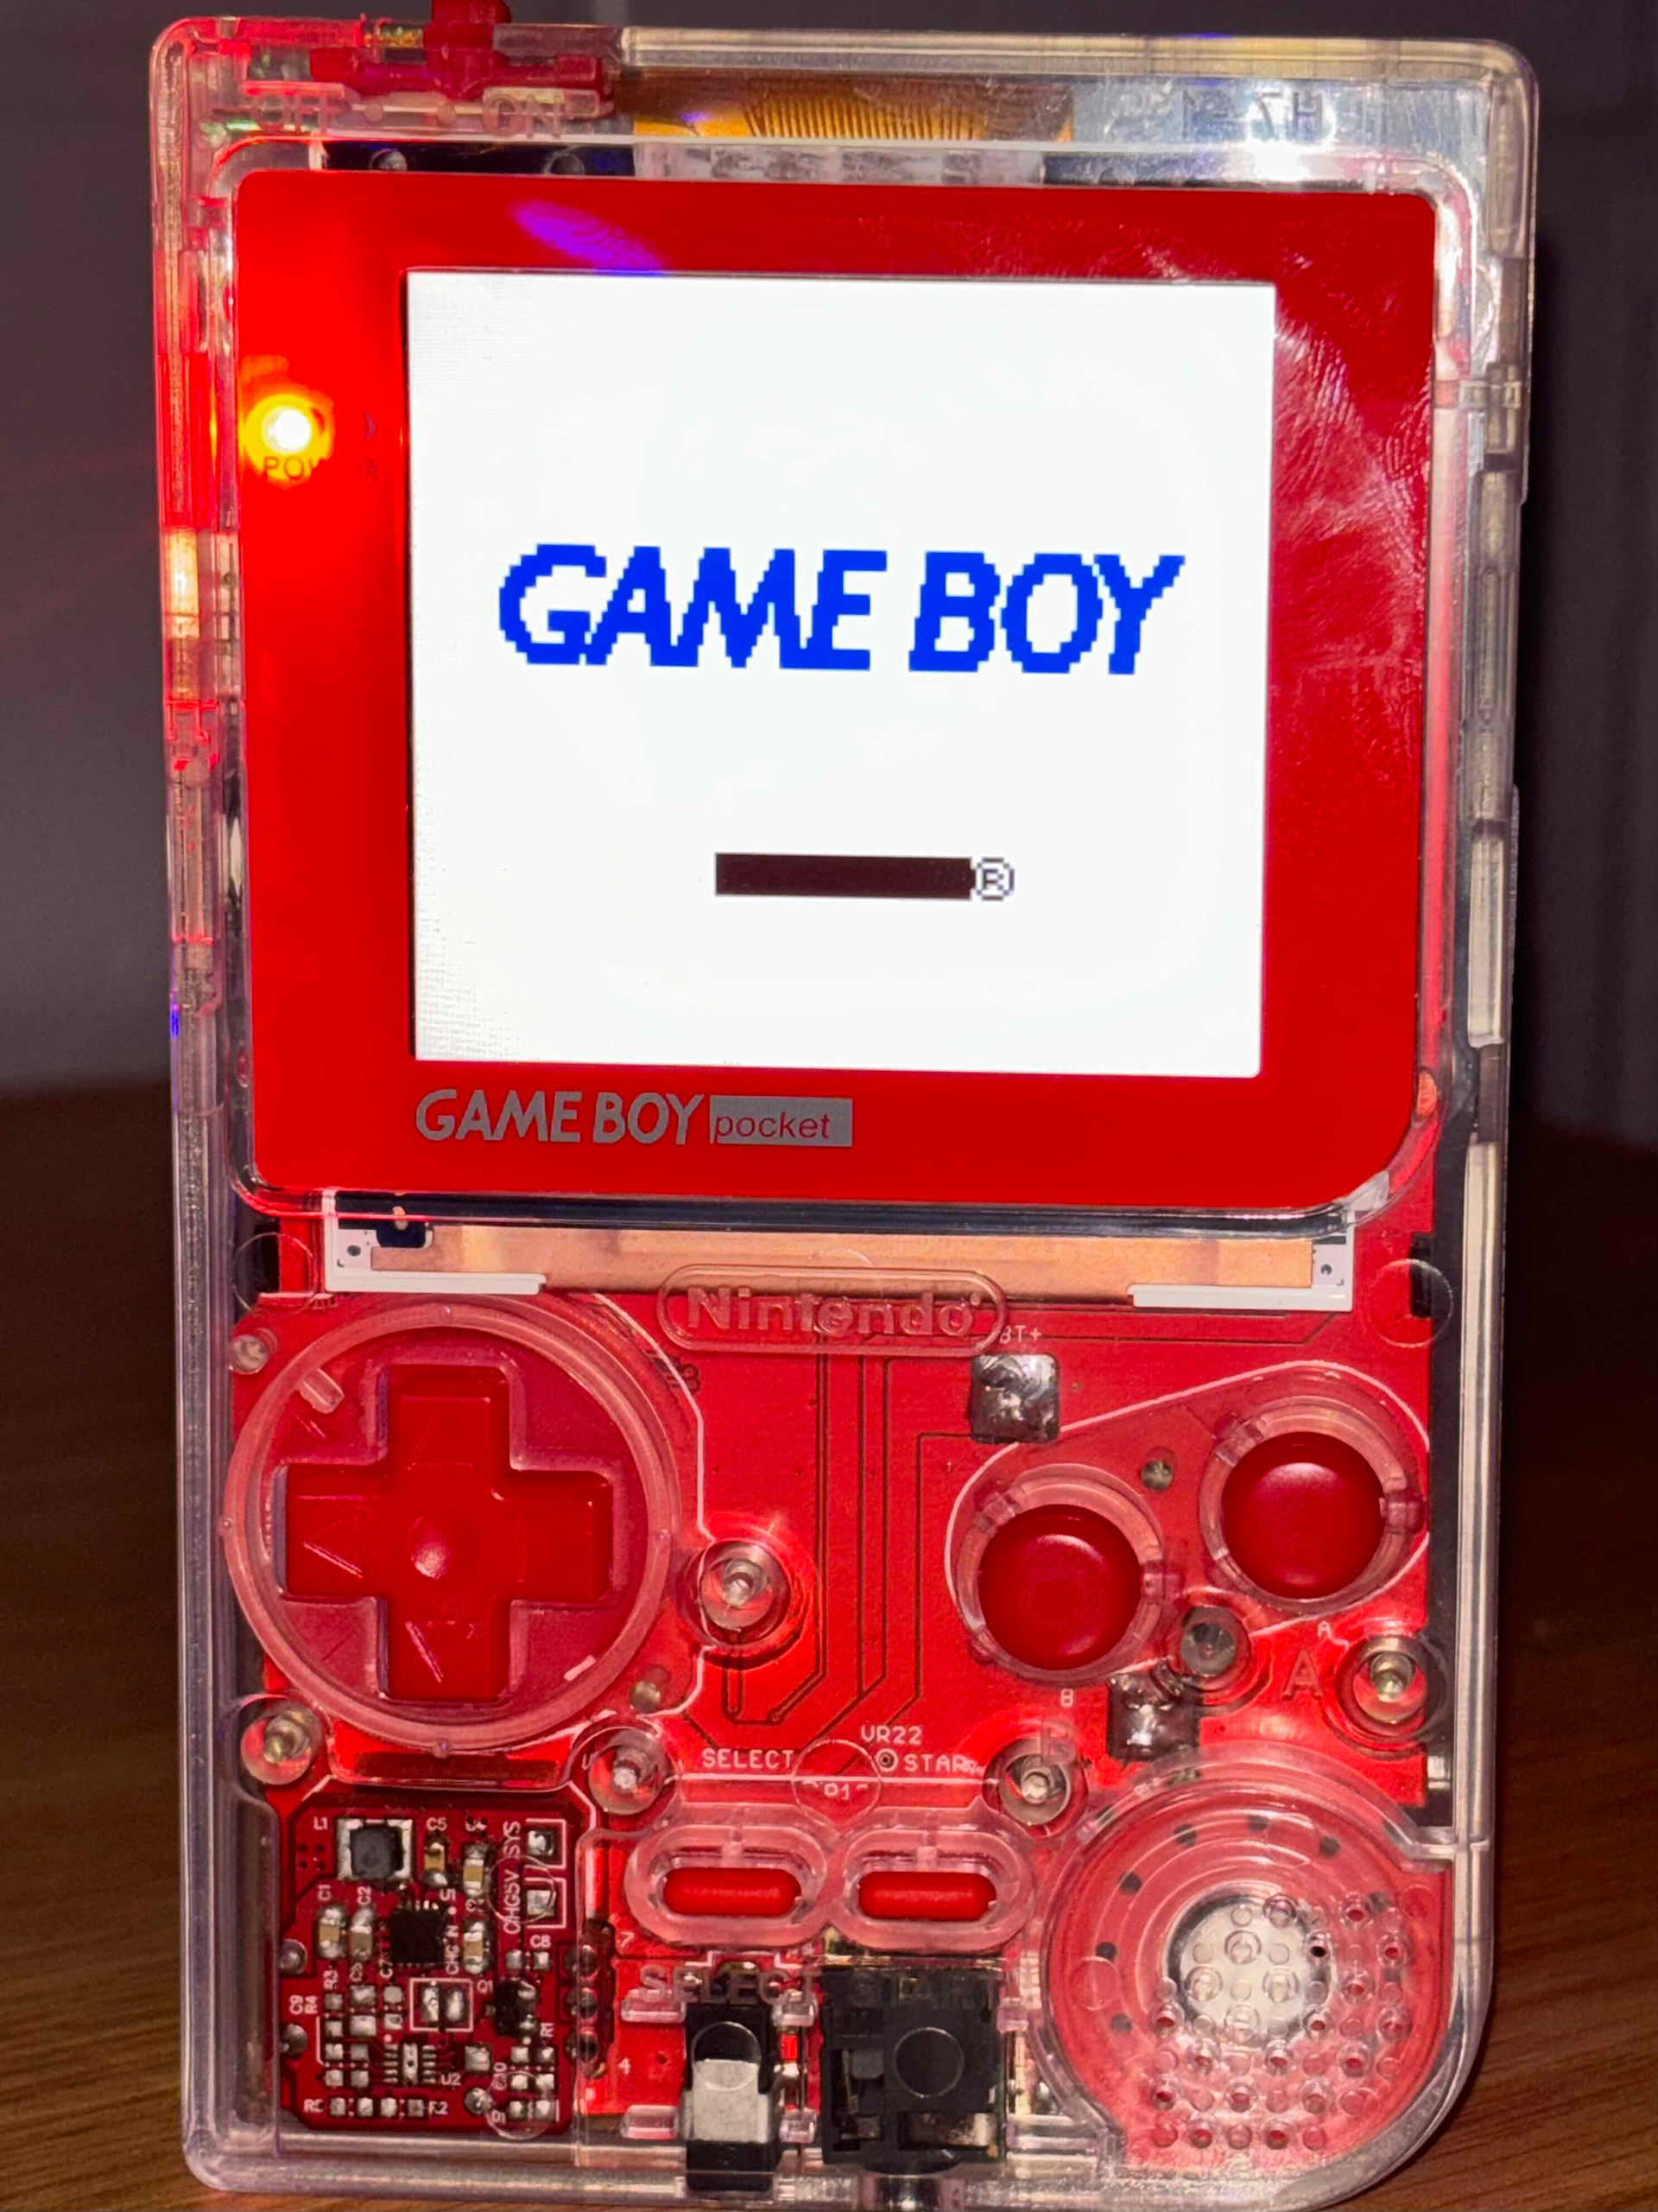
Every component was soldered by hand, since I did not have access to a microscope, and this part of the process took about 6 days. Once everything was soldered, I starting doing some benchmark testing by putting in a game and seeing if it would turn on. This is where I faced my first problem. The LED Power Indicator was turning on, but I wasn't getting any picture from the screen, or sound from the speaker, which meant there were a few issues I'd need to address with my soldering (legs on the CPU weren't fully secured, solder bridges, etc.)
PICTURE 2
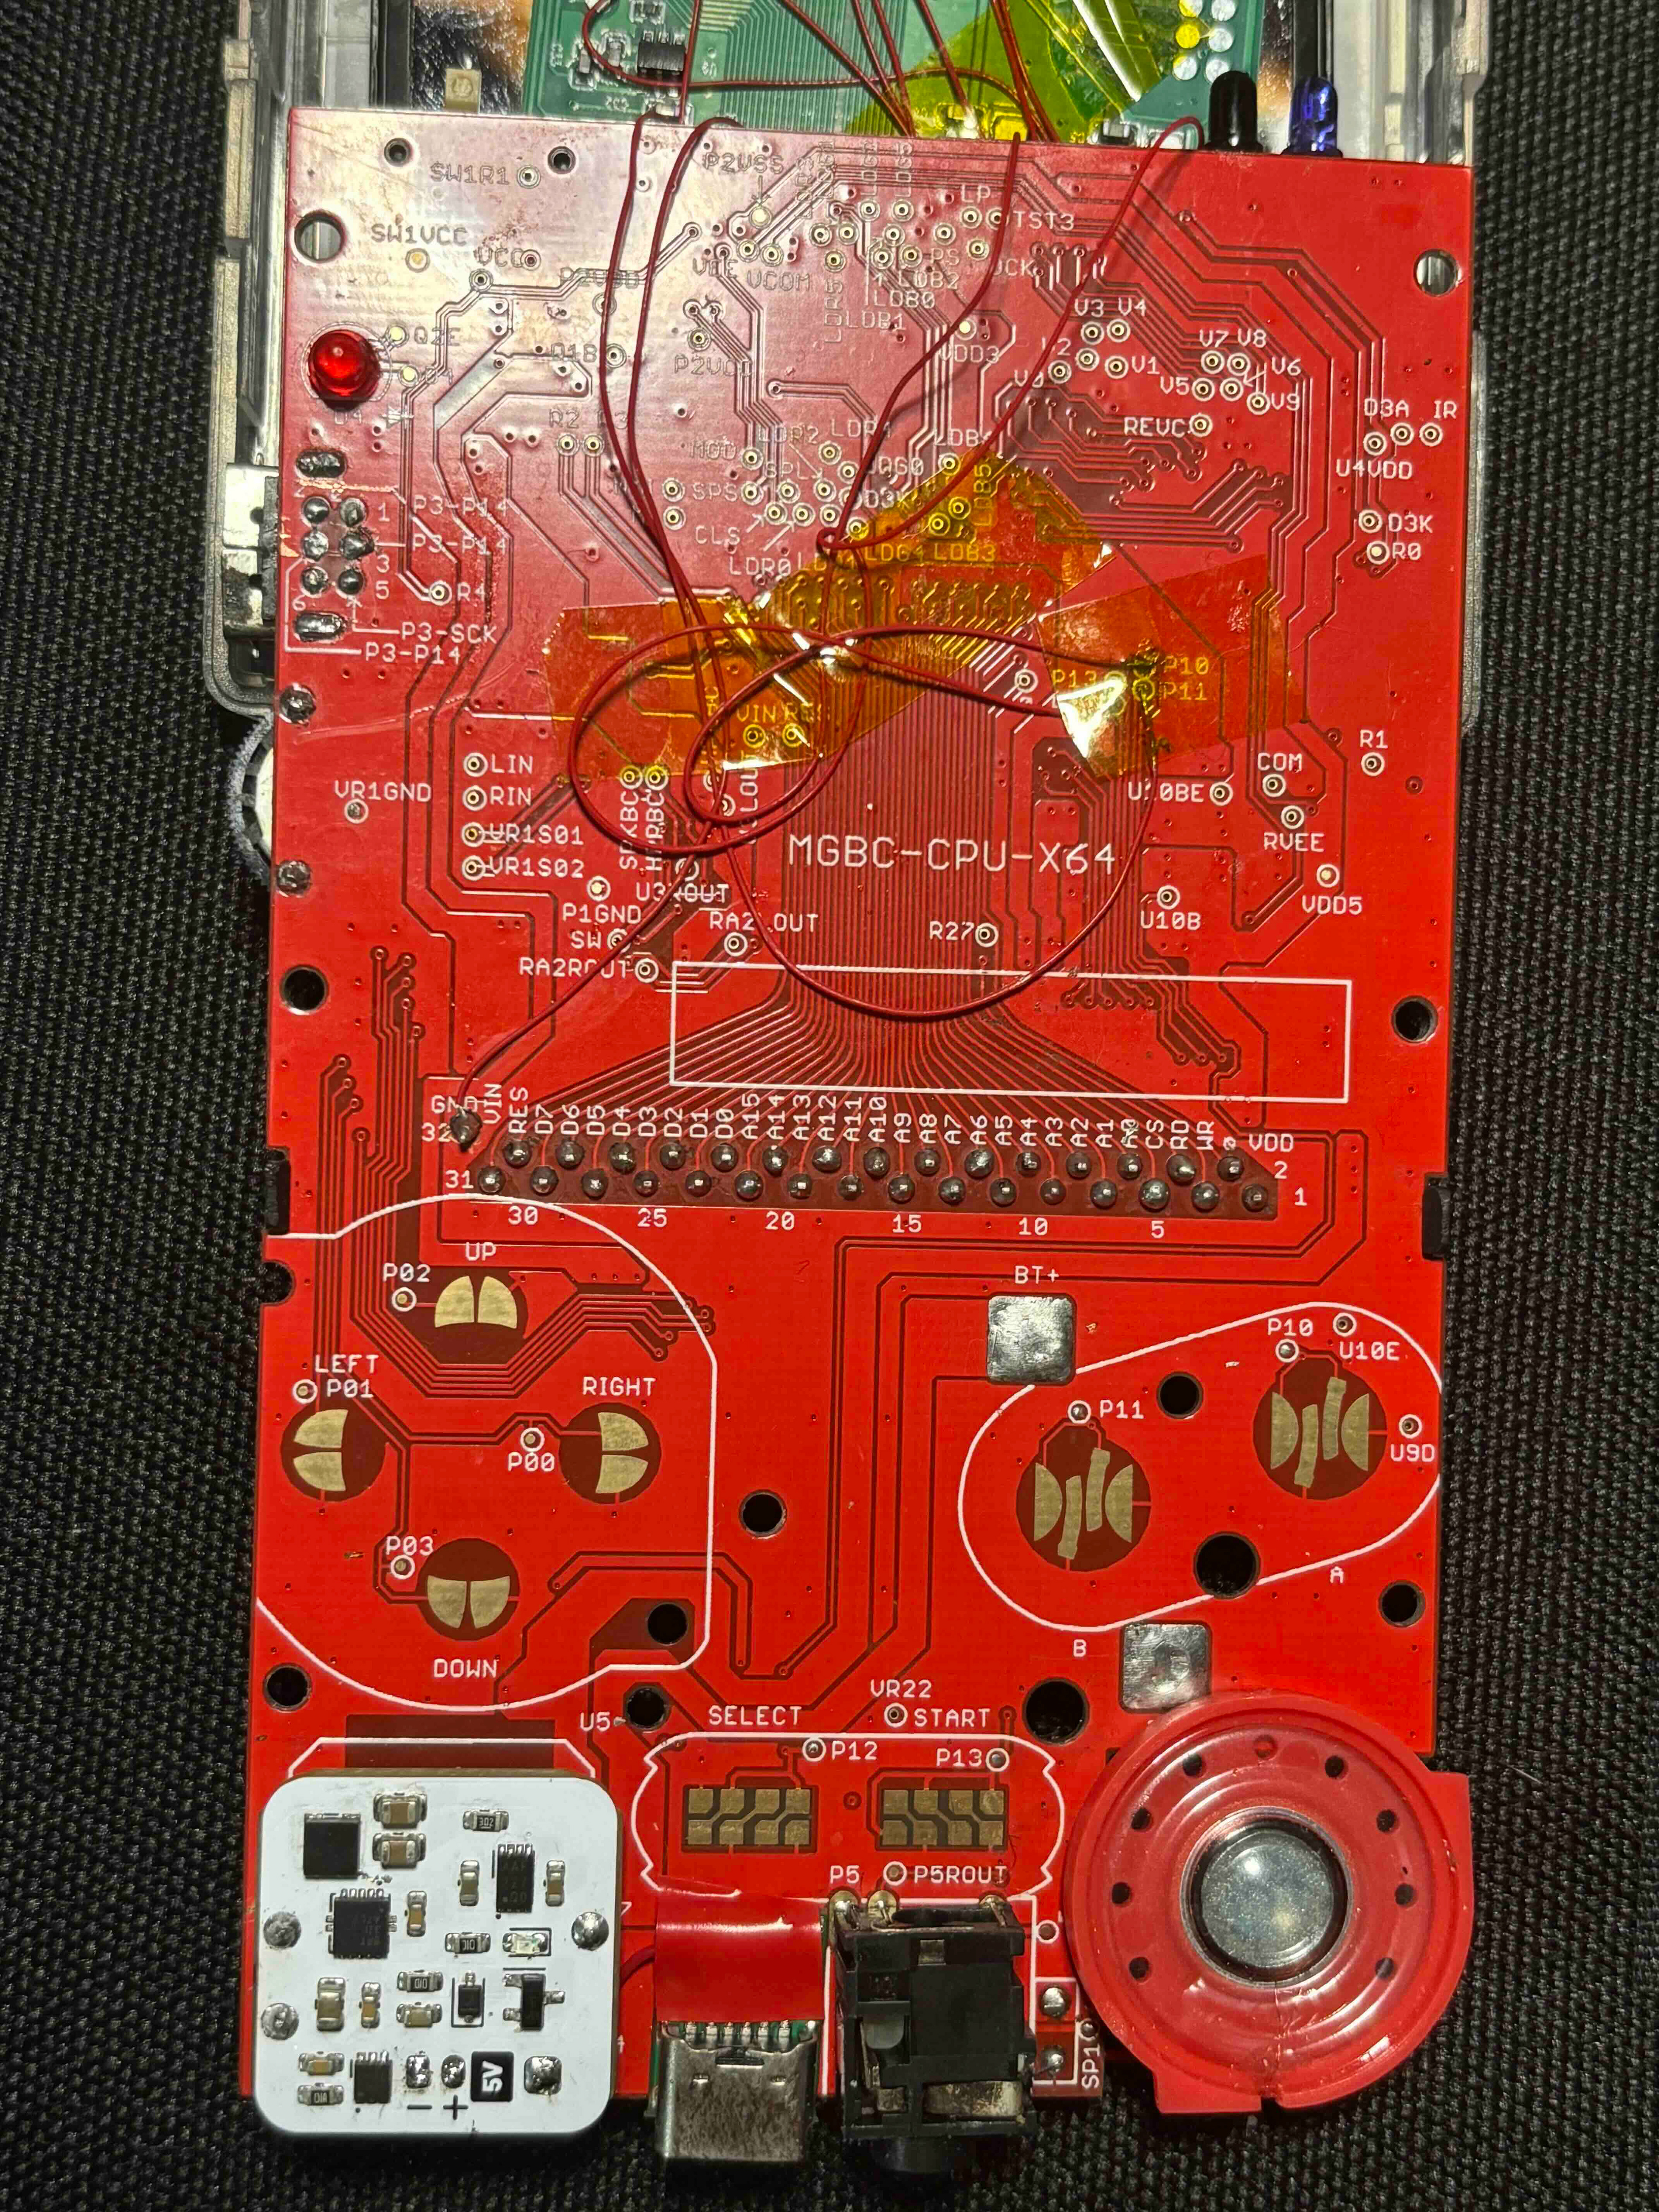
After spending another week touching up the solder, and an entire syringe of flux, I was ready to start putting everything together. In this part, I had a new mod to add to this project, was a new power regulator. I decided to assemble the GBPP (GameBoy Pocket Power) Regulator. I thought this would be a great first mod since this opened the door to me adding a rechargeable batter, along with USB charging, which would also be a great plus.
After installing the GBPP, I found some USB-C breakout boards, and soldered it to the GBPP, and installed a LiPo (Lithium Polymer) cell battery, which enabled the first iteration of my POCO having USB-C charging, with a rechargeable battery. However, this way of USB charging offers no surge protection for the LiPo cell, which means if there is a sudden and large increase in power during charging, it could lead to the LiPo cell to combust.
PICTURES 3 & 4
Another prolific modder in the GameBoy modding community, Natalie the Nerd, developed a new power regulator specifically made to include this surge protection, along with a direct line to the USB-C port, so the charge filters through the regulator. This is a much safer way to implement USB charging, hence the name: Safer Charge DC. A really great quality-of-life addition to this regulator is an LED indicator that turns on when the GameBoy is plugged in, then turns off when the battery is fully charged.
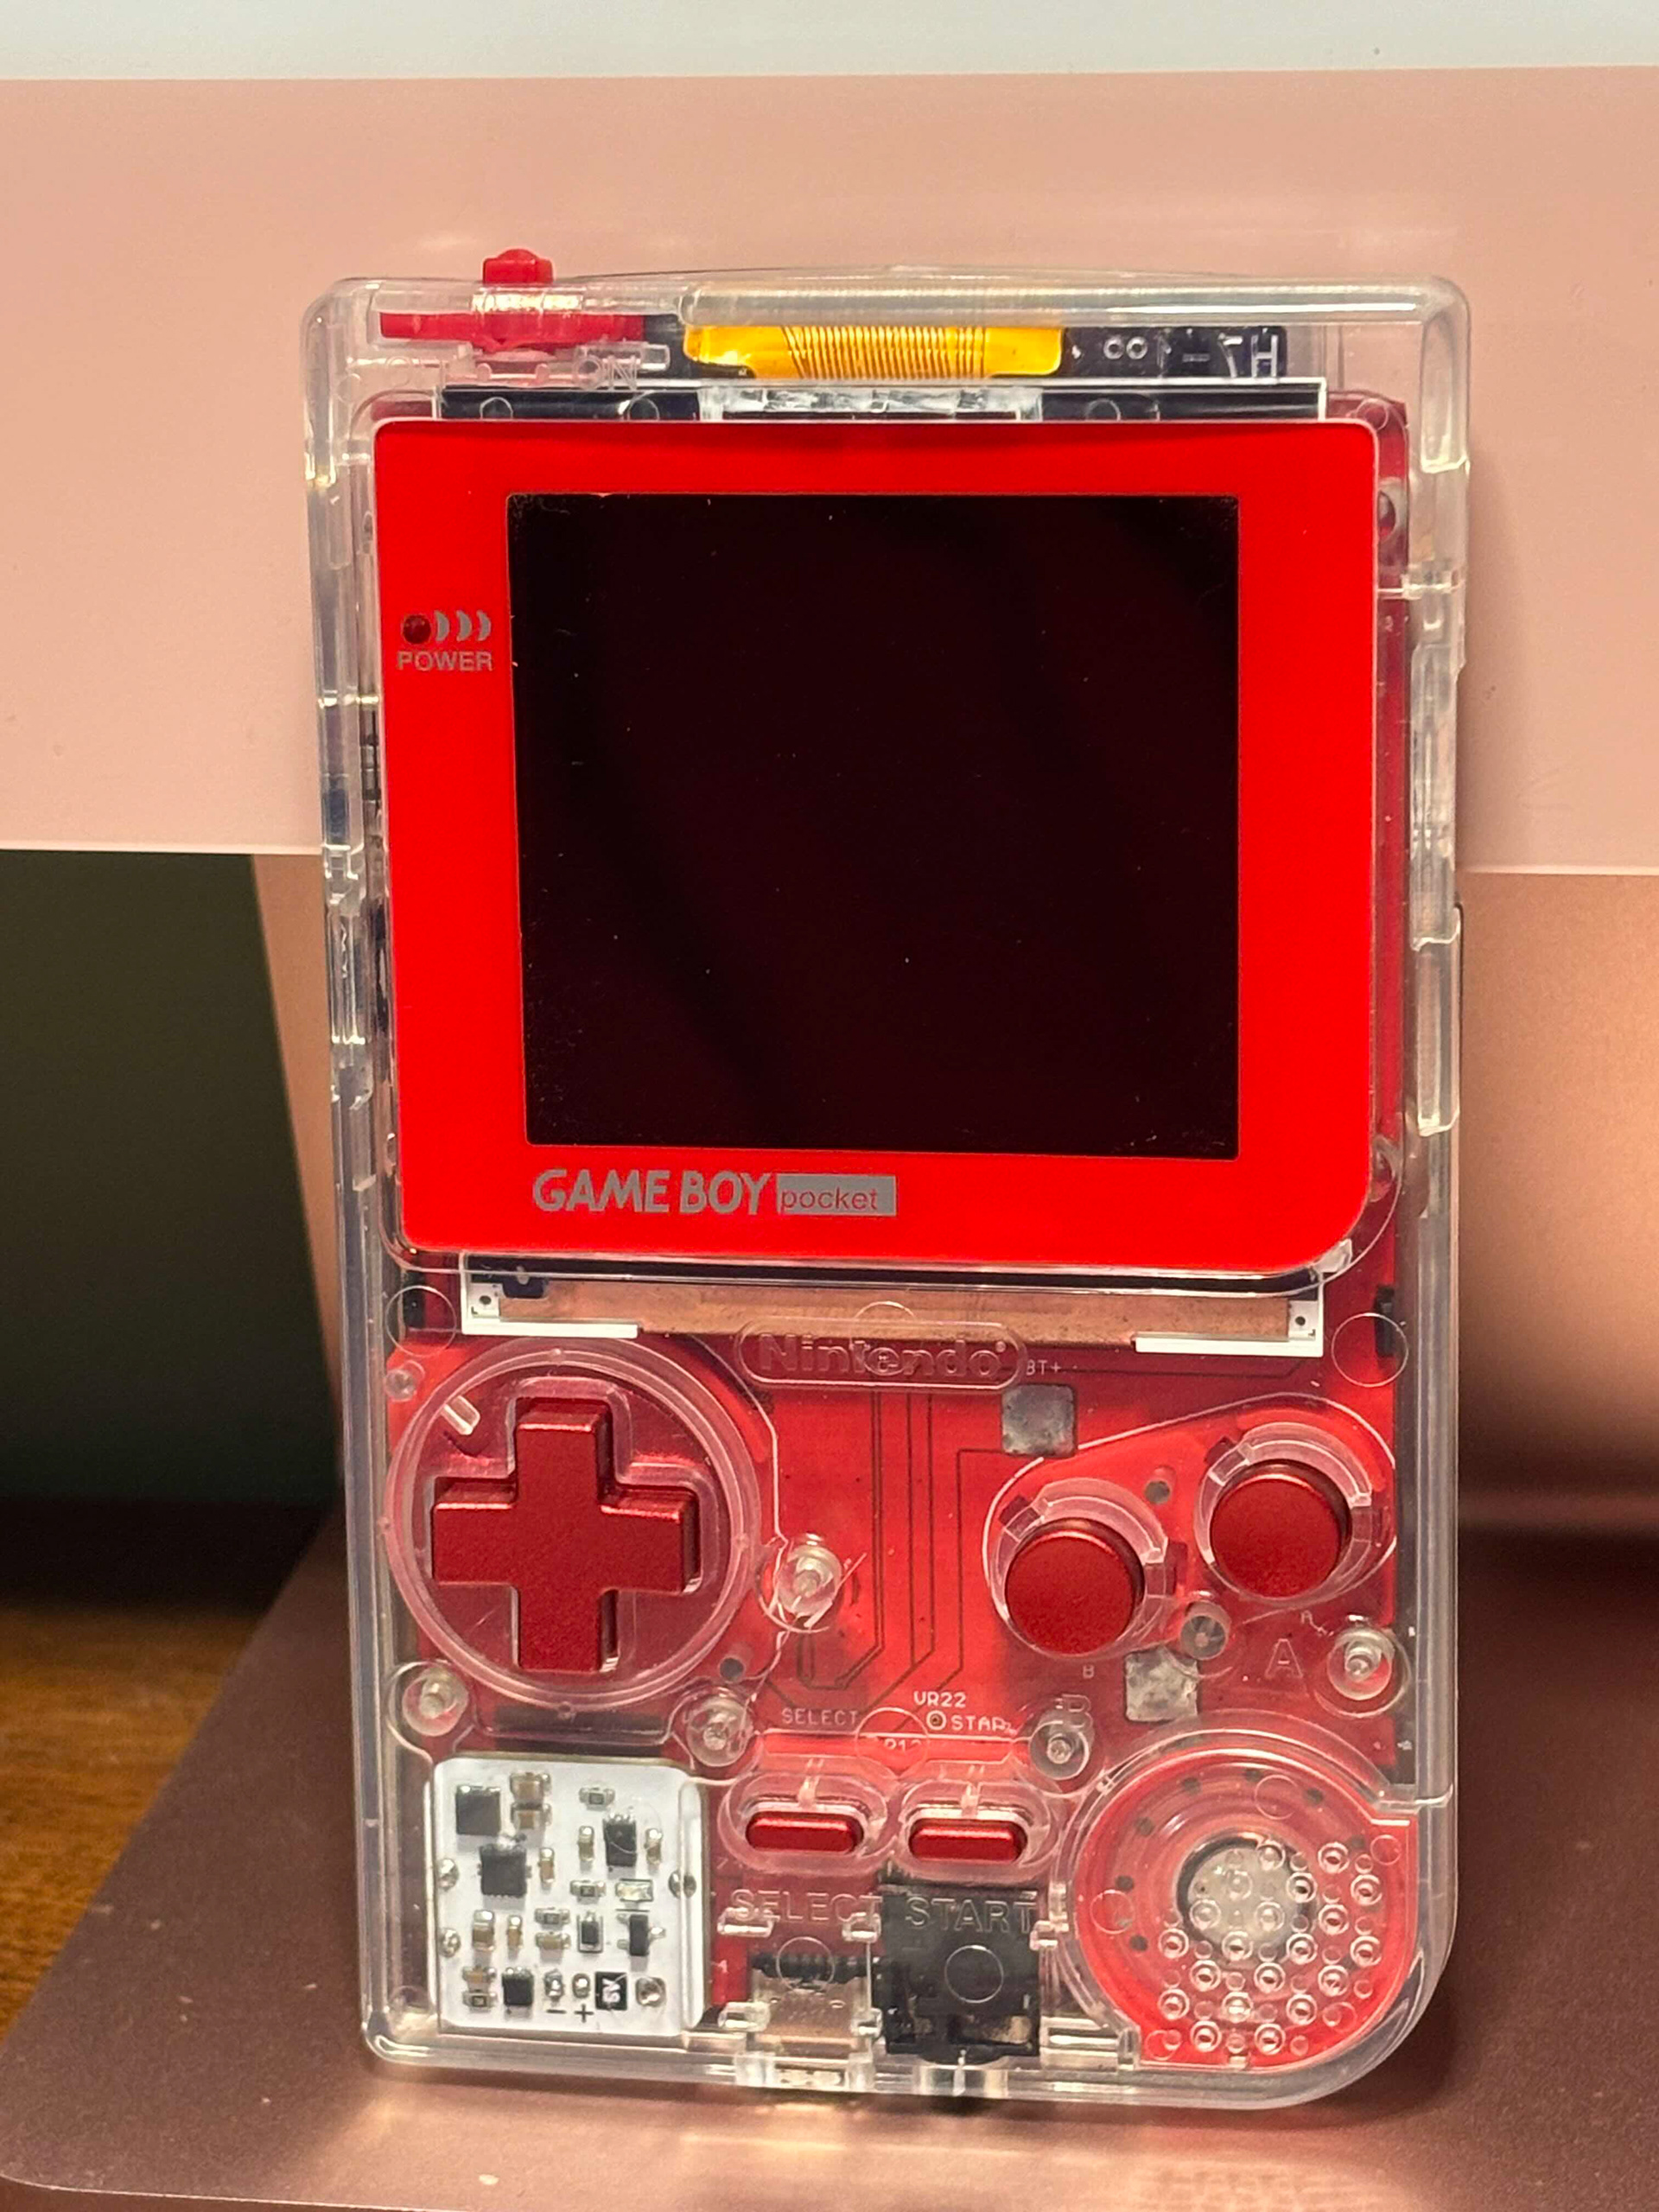
Finally, I added some custom aluminum CNC-machined buttons anodized in red, to bring the look and feel to a whole new level. These buttons have a great feeling when being pressed, and the most improved factor from plastic to aluminum is that the aluminum buttons won't chip, crack, or flatten from extended use, which is something that aftermarket plastic buttons suffer from on a regular basis.